Our traditional cutting diagrams don’t really work with thrust-centric rapier plays. So we have created a new style of diagram more suited for the style.
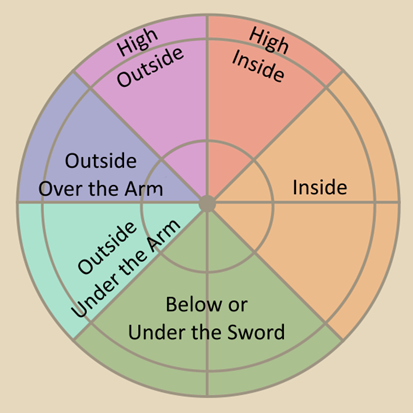
To start, we divide a circle into zones. These aren’t specific places on the opponent, but rather relative to where their sword would be in 3rd (e.g. Terza/Tertia, Langort).
Onto this diagram we place numbers that indicate roughly where the action starts and lines showing where the point is moving.
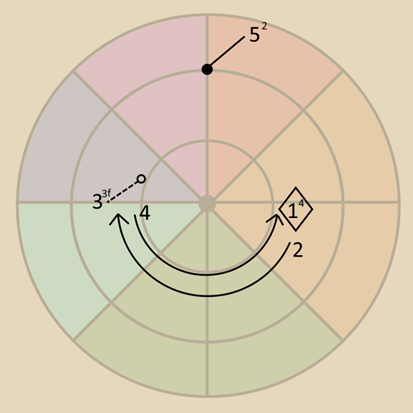
- • Thrusts have a dot to represent the target.
- The line indicates the approximate location of the hilt and direction the thrust is coming from. A short or missing line represents a straight thrust; a long line indicates the thrust is steeply inclined.
- The small number indicates the hand rotation, 1st thru 4th.
- Feints have a hollow dot, dashed line, and small f.
- Parries are represented by a diamond. If the parry is also a counter-thrust, a dot and line will accompany it.
- Disengages are denoted with a curved arrow.
- Cuts will have a line without a dot.
Applying these key to the diagram, we get,
1. Parry on the inside in 4th, the hilt about waist high.
2. Disengage to the outside.
3. Feint a thrust in 3rd over the arm to the right chest.
4. Disengage back to the inside.
5. Thrust from above in 2nd to the face.
For more examples, check out our Meyer Rapier posters.
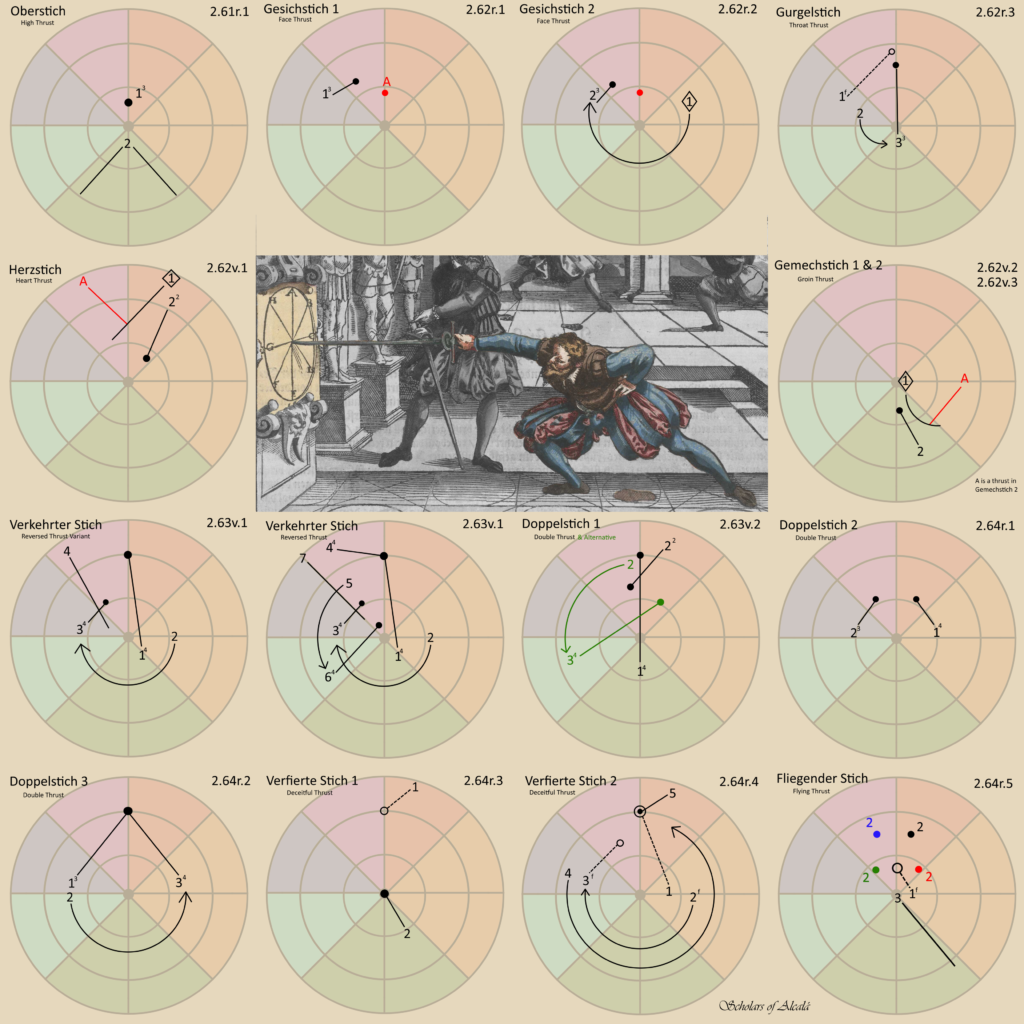
For details of these plays, check out our Meyer Rapier Drillbook or sign up on meetup.