The cutting diagrams we are using in class are inspired by the Meyer Lund diagrams. We don’t have clear instructions on how to interpret these diagrams, but it’s fairly clear that they meant to be used as patterns for cuts and thrusts.
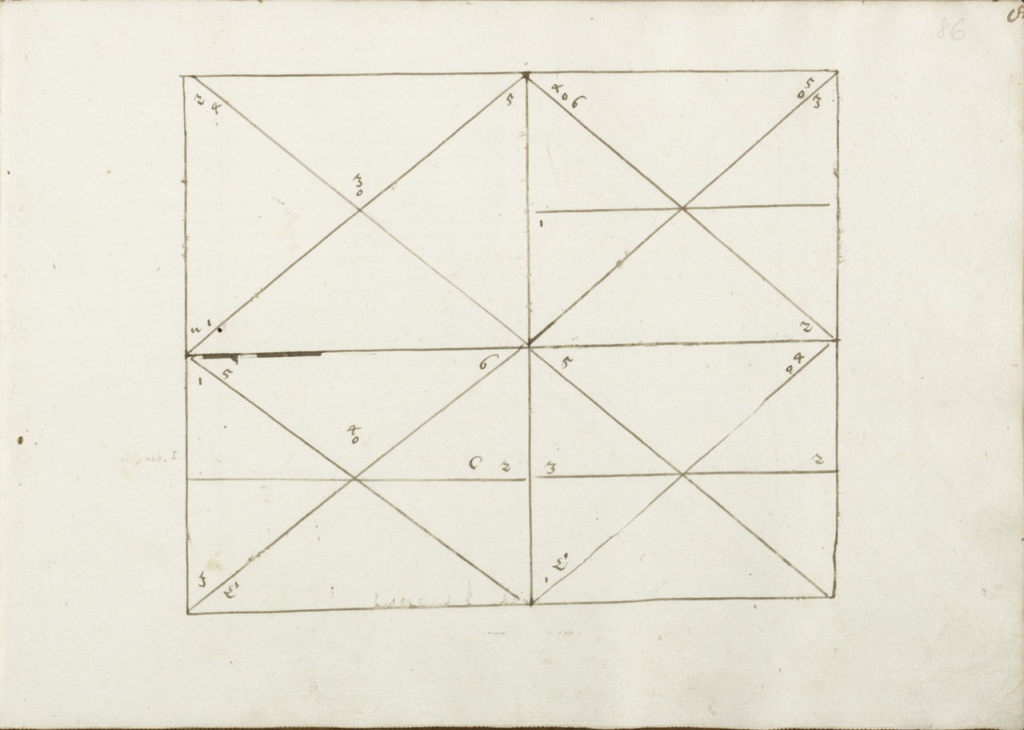
Since Meyer didn’t leave us with a key, we have to invent our own for our club’s diagrams.
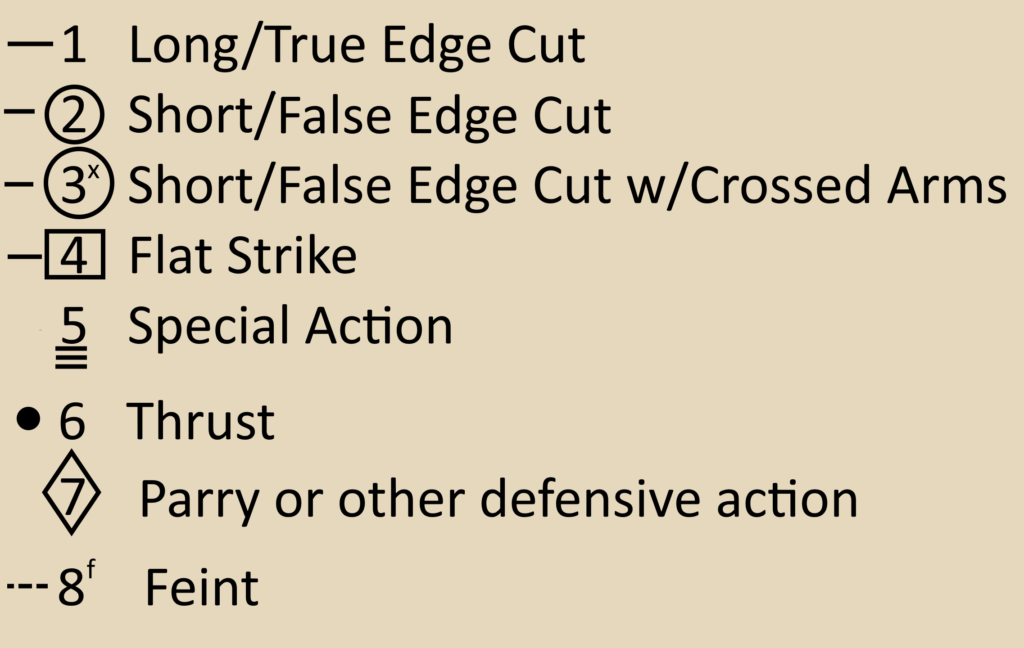
To illustrate how they are used, here are the devices from today’s class.
Meyer’s Example Device
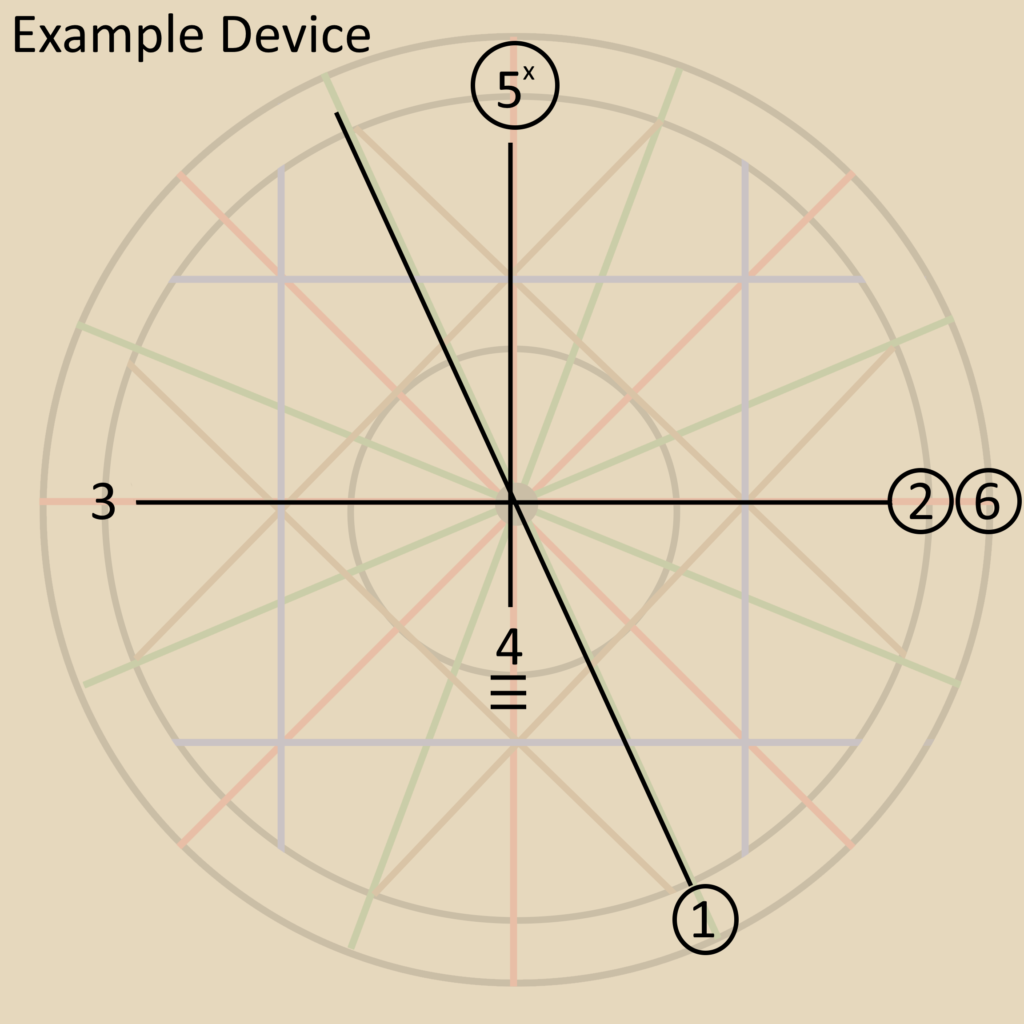
- Slash up with the short edge
- Zwerch with the short edge to the opponent’s left side, if parried, don’t allow it to touch
- Zwerch with the long edge to the opponent’s right side
- Press the opponent’s hands upwards with the cross of your sword
- Cut downwards with the short edge and crossed arms.
- Zwerch away, ending in the guard of your choice.
Tag 1
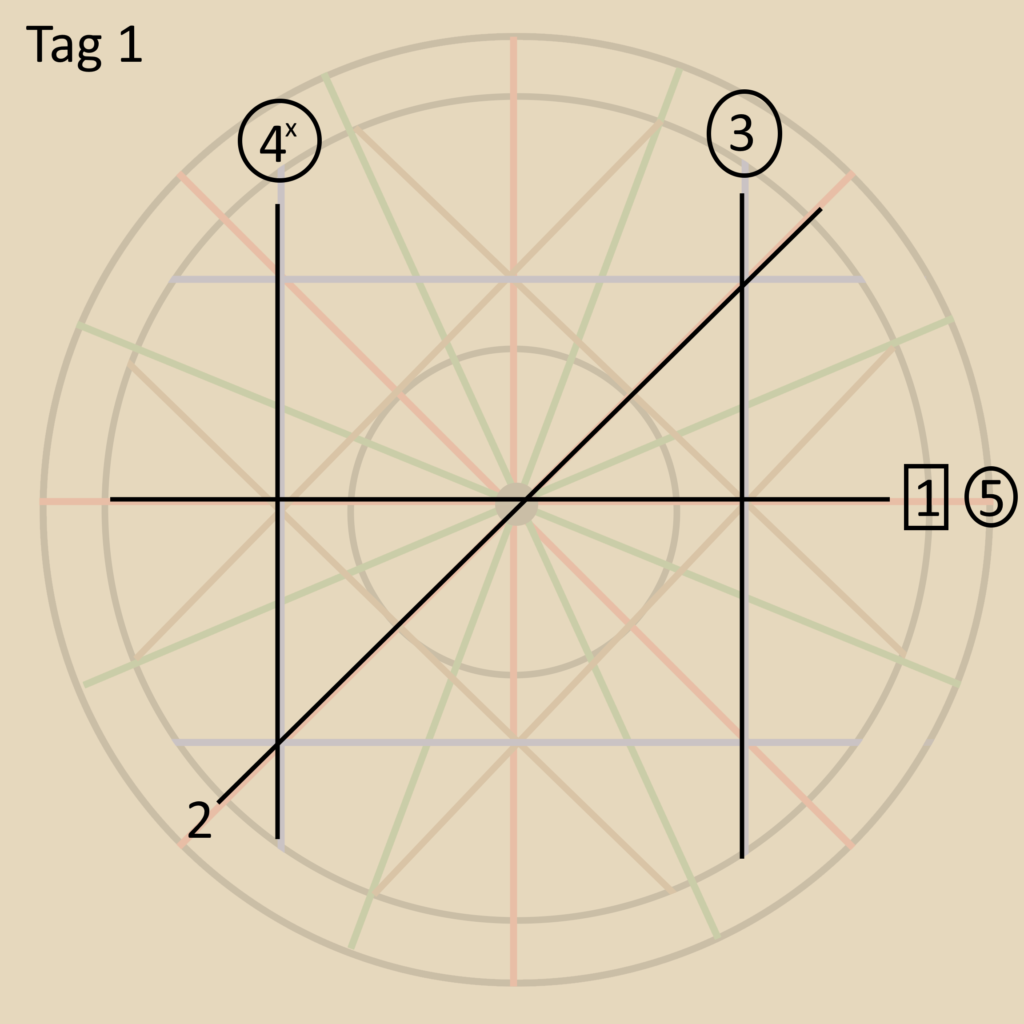
- Parry with the outside flat of the sword
- Zwerch with the long edge to the right arm
- Cut downwards with the short edge, allowing it to run off without touching if parried
- Cut downwards with the short edge and crossed arms
- Zwerch away, ending in the guard of your choice.
1 comment